3 Steps – Guide to getting started with Salesforce Data Loader
Before getting started, you need to understand that Salesforce Dataloader uses APIs for communicating with the system. So it is available only from Salesforce Enterprise edition and above. However, if you are a new Salesforce user and are using the Professional edition, we recommend asking your Salesforce Account Manager for courtesy APIs for a week or two. This way you would be able to import all your data from CSV files and spreadsheets into Salesforce.
There are 2 ways of going about using Data Loader. (i) Dataloader GUI and (ii) Dataloader CLI. It might sound more complicated than it really is. Let’s get to it in a bit.
Salesforce Data Loader is used for uploading data from CSV files into Salesforce with the least amount of effort. All you have to do is create the right fields in Salesforce Objects. Map these SF fields to the CSV Column headings. Initiate the transfer of data with a few clicks in SF Data Loader. Having said that, let’s understand a bit more about GUI and CLI options before installing the Tool.
User Interface (Dataloader GUI): This option allows you to input configuration settings, select CSV files for import/export, and establish field mappings between your import file and Salesforce fields using the graphical interface.
Command Line (Windows only – Dataloder CLI): Utilising the Salesforce Dataloader Command Line Interface, you can define configurations, data sources, mappings, and actions through files. This approach facilitates setting up Data Loader for automated processing, enabling seamless integration into automated workflows.
In this article, we are going to understand how to use the CLI for data migration.
3 Key steps include – (1) Dataloader installation, (2) Configuration and (3) Data Import.
Salesforce Data Loader Installation Process:
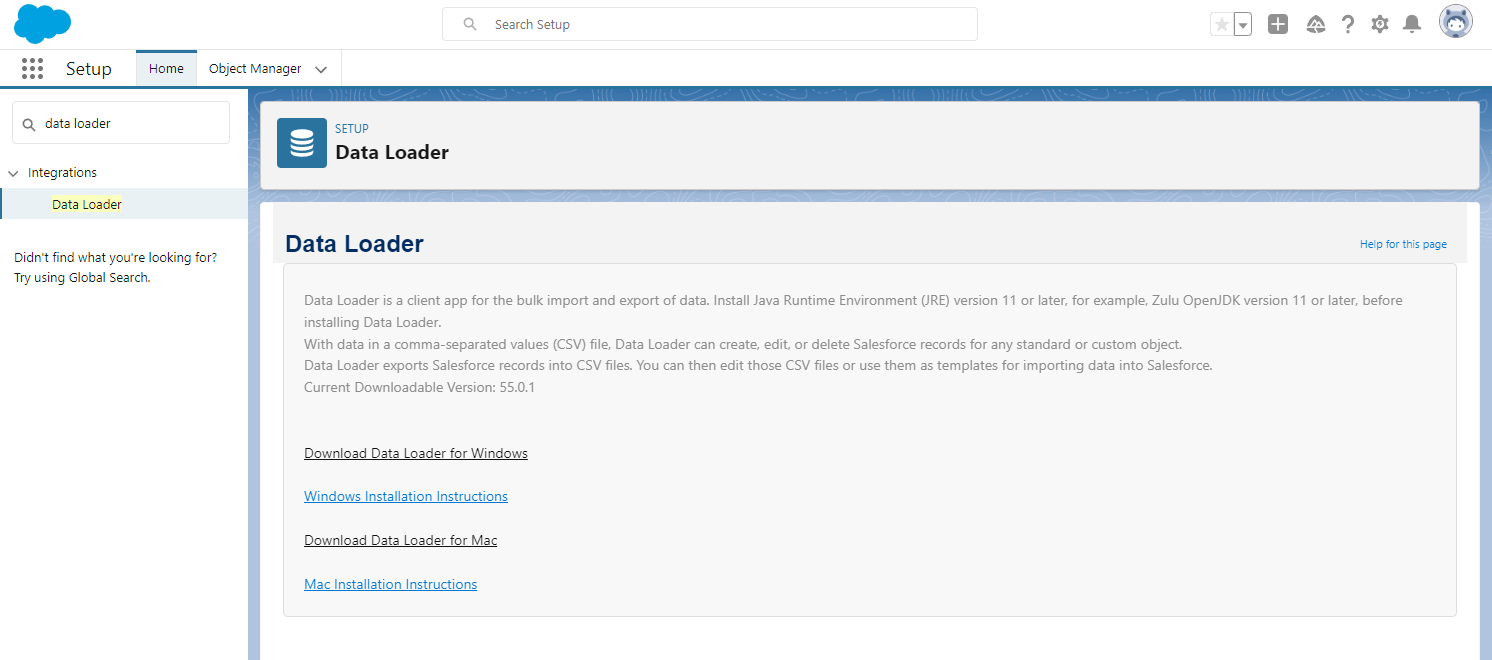
Login to your Salesforce Lightning. Click on the “gear” icon on the Top Right corner and go to “Setup”. Search for “Data Loader” in the Quick Find bar. Download Data Loader as shown in the image below.
Once you click on the right option for you. A zip file will be downloaded. Extract and run the file with the name “Dataload” by double clicking on it. This is a Windows Batch File. You can consider creating a shortcut of this file on your desktop, as you’d be running this file everytime you want to use Dataloader.

Import your CSV and select your object. After configuring settings, choose your desired action (e.g., insert, update, upsert, delete, export) and select the Salesforce object along with your CSV file.
Map your CSV columns to Salesforce fields. Data Loader’s auto-mapping feature may not be intuitive, so manually drag CSV field names to their corresponding Salesforce fields. Save this mapping for future use as a .sdl file. Likewise specify a directory for your logs detailed success and error log files. Creating a new folder for sync logs is recommended. Once chosen, your sync will commence immediately.
Zivoke’s 5 cents on Salesforce Dataloader:
Overall, Data Loader gets work done (most of the time ;)). It would be difficult to use DL for millions of records at a go. Technical Teams need to understand when Dataloader can be used. However, it just gets work done for less volume / small teams.
Relating data is important while importing into Salesforce. For e.g. if you want to upload Account and Contact information. We need to import the Account data first. Then download the Unique ID from Salesforce. Use this unique identifier in the associated Contact records before importing them. Accounts / Contacts would become orphan if the unique ids are not related.
Feel free to get in touch with us, if you are facing issues with Data Migration. Zivoke’s Certified Salesforce consultants would be more than happy to assist you.